
Pursuit RFQs are particularly useful when exact delivery schedules and quantities are not yet finalized.
They allow buying organizations to forecast potential requirements and establish pricing agreements ahead of confirmed demand.
While the submission process largely mirrors that of standard RFQs, this section provides a detailed explanation of the specific differences applicable to Pursuit RFQs.
Step 1:
Receive Intimation of RFQ from the Buyer for SoW confirmation
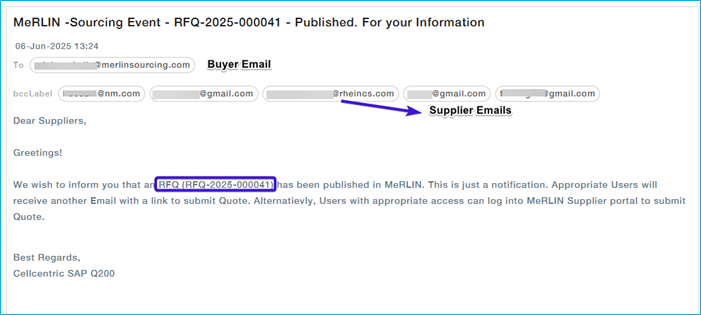
Once an RFQ is published, selected suppliers receive two email notifications from MeRLIN:
First Email: Contains high-level details such as the RFQ ID.
Second Email: Includes the RFQ number, a brief name, and a direct link to the Statement of Work. This is Sent individually to each supplier with the buyer in CC.
First Email: RFQ Publish Notification
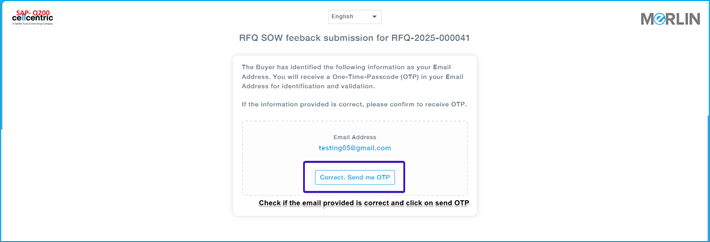
You will be redirected to a new browser tab displaying the supplier verification page.
Review your supplier information and, if the email id is correct, click “Correct. Send me OTP” to proceed.
You will receive an email with OTP
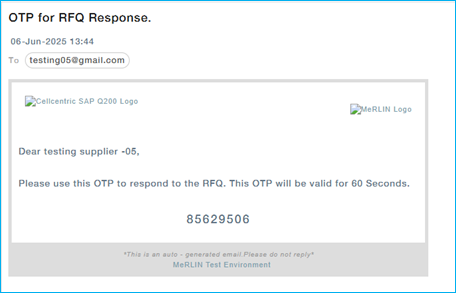
Enter the OTP received through the email and click Confirm and Proceed.

The page will be redirected to the SoW tab to provide feedback. 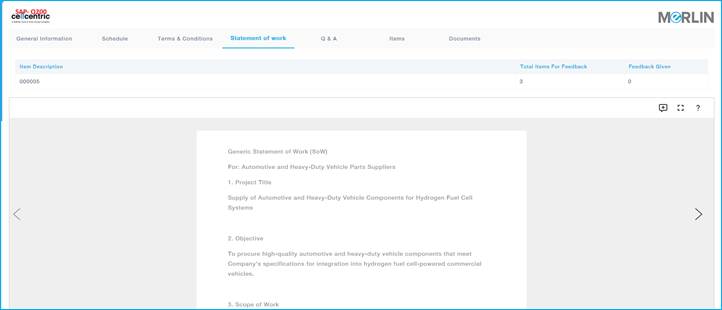
Responding to SoW through MeRLIN’s supplier Portal
- Login to the Supplier Portal.
- Menu path: Sourcing Events –> Active RFQs –> Action –> Give Feedback
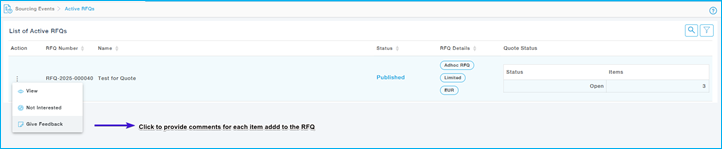
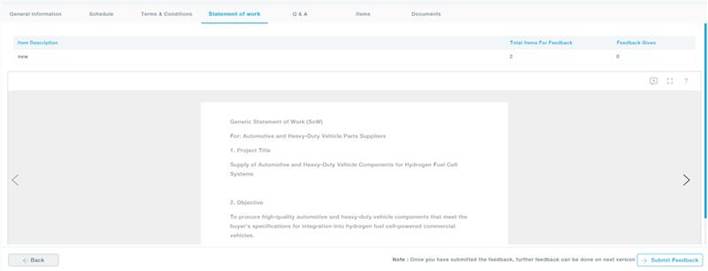
The supplier will be able to view the entire SOW for the provided Item and give the feedback as required.
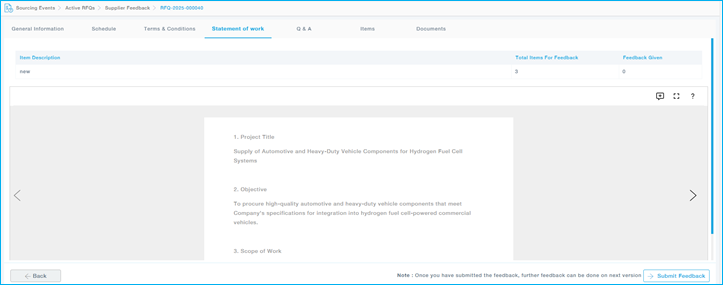
| Field | Description |
| Item Description | This section lists the item or part for which the feedback or statement of work (SOW) is being provided. |
| Total Items for Feedback / Feedback Given | This section provides a summary of the total number of items for which feedback is required and the number of feedback entries already provided. |
| Statement of Work (SOW) Content | This area displays the content of the SOW for the selected item. It explains the purpose and scope of the statement of work, including details like project requirements, payment terms, and roles of stakeholders. |
| Add comments, Full Screen mode, help Options | The Add Comment icon enables users to provide additional information or feedback.
The Help (?) icon offers guidance on how to add, edit, or delete comments from the document. The Full Screen Mode icon allows users to expand the content to view or adjust to the zoom level for enhanced readability. |
| Navigation Controls | This control allows the user to navigate between different pages or sections of the SOW content, such as moving to the next or previous item or section. |
Step 3:
Adding feedback to the SoW
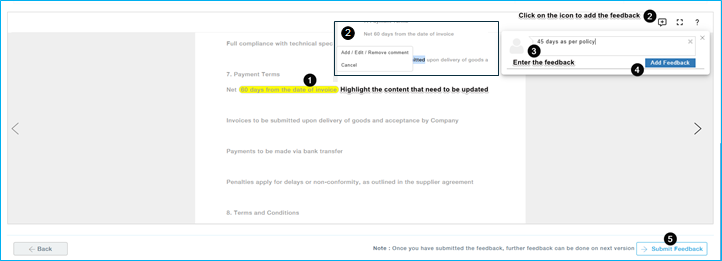
- Identify any phrases or sections that need modification and highlight the relevant text.
- Right-click on the highlighted text and select the “Add Feedback” option, or click the feedback icon located at the top-right corner of the SoW document.
- In the feedback panel that appears, provide a clear and concise description of the suggested change in the text box.
- Click “Add Feedback” to save your input.
- After reviewing and adding feedback for all necessary sections, click “Submit Feedback” to complete the process.
Items Tab
In case if each item has different statement of work linked then the supplier can view the SoWs for each item in the items tab and provide feedback for each item.
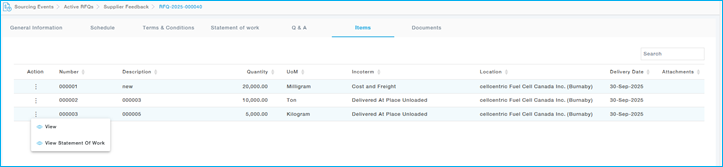
After providing the necessary changes click on the Submit Feedback button.
Note: The feedback will be reviewed by the buyer and then finalized with the necessary changes. Once the changes are made, they are reflected in the Supplier Portal. If the supplier requires additional modifications, they can submit further feedback. This iterative process continues until the buyer reviews and finalizes the Statement of Work (SOW).
Once the associated Statement of Work is finalized by the Buyer and the Quote submission window opens, one of the registered Supplier contacts will be able to submit the Quote.
Understanding The Pursuit RFQ Structure
It is important to understand how the RFQ is organized in MeRLIN and presented to Suppliers before proceeding with the Quote submissionThe RFQ information is organized into several logical sections to make navigation and response easier:
General Notes on RFQ and Quote Fields:
Any field / information mandated by the Buyer as part of the Quote is marked by a red asterisk icon.

Any field / information where an input can be provided by the Supplier is with white background.

Any field / information those for read-only purpose is greyed out.

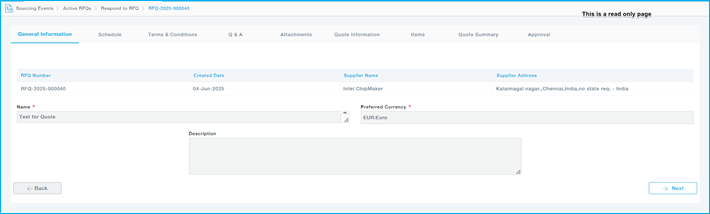
General Information – Provides an overview of the RFQ, including basic details and identifiers.
Schedule – Displays the timeline and deadlines for all RFQ-related activities. 
Terms and Conditions – Lists the applicable terms and conditions set by the buyer. 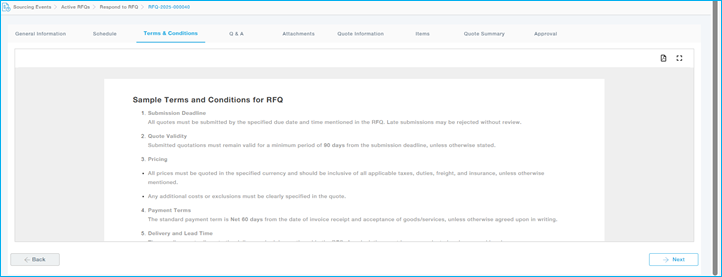
Q&A – This tab lists buyer questions that require your responses. Some may also need comments or attachments, which can be added using the icons on the right. 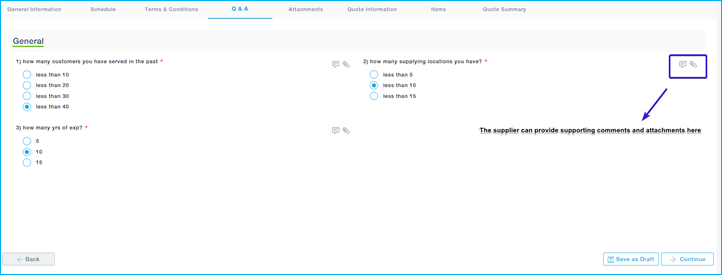
Attachments
Buyer Attachments Tab: Documents attached by buyer will be listed here. 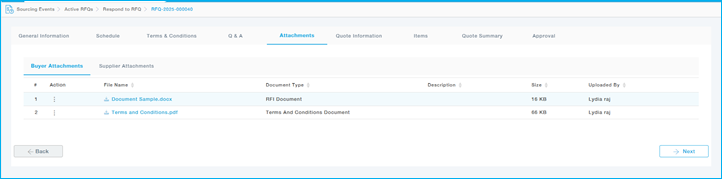
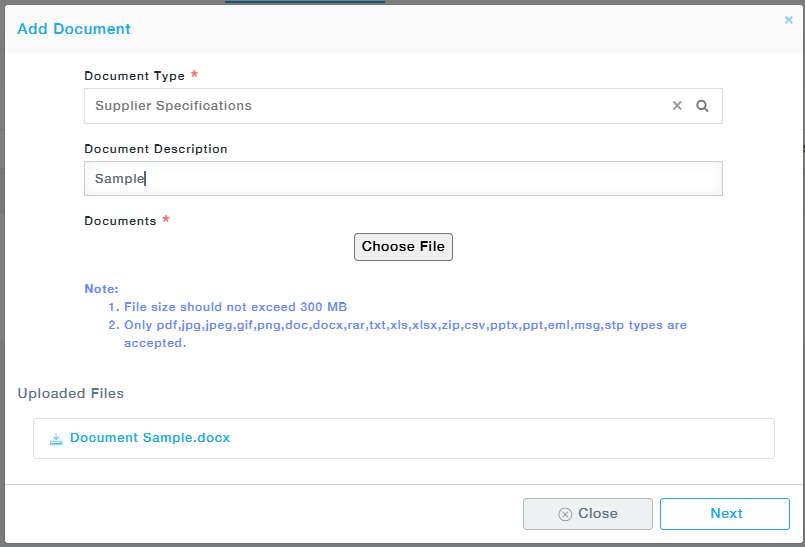
Supplier Attachments: Supplier can attach the supporting document here.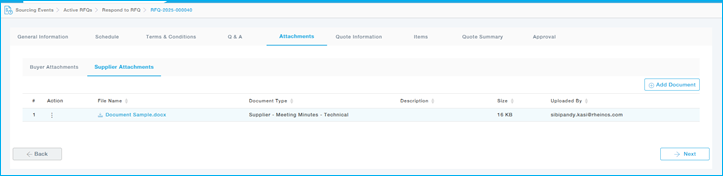
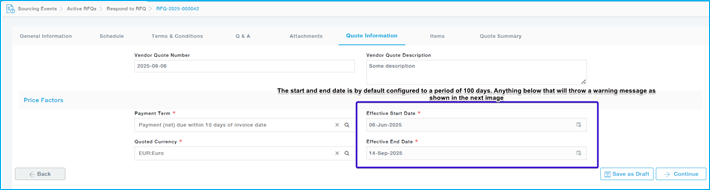
Quote Information – Suppliers provide key high-level details of their quotation in this section.
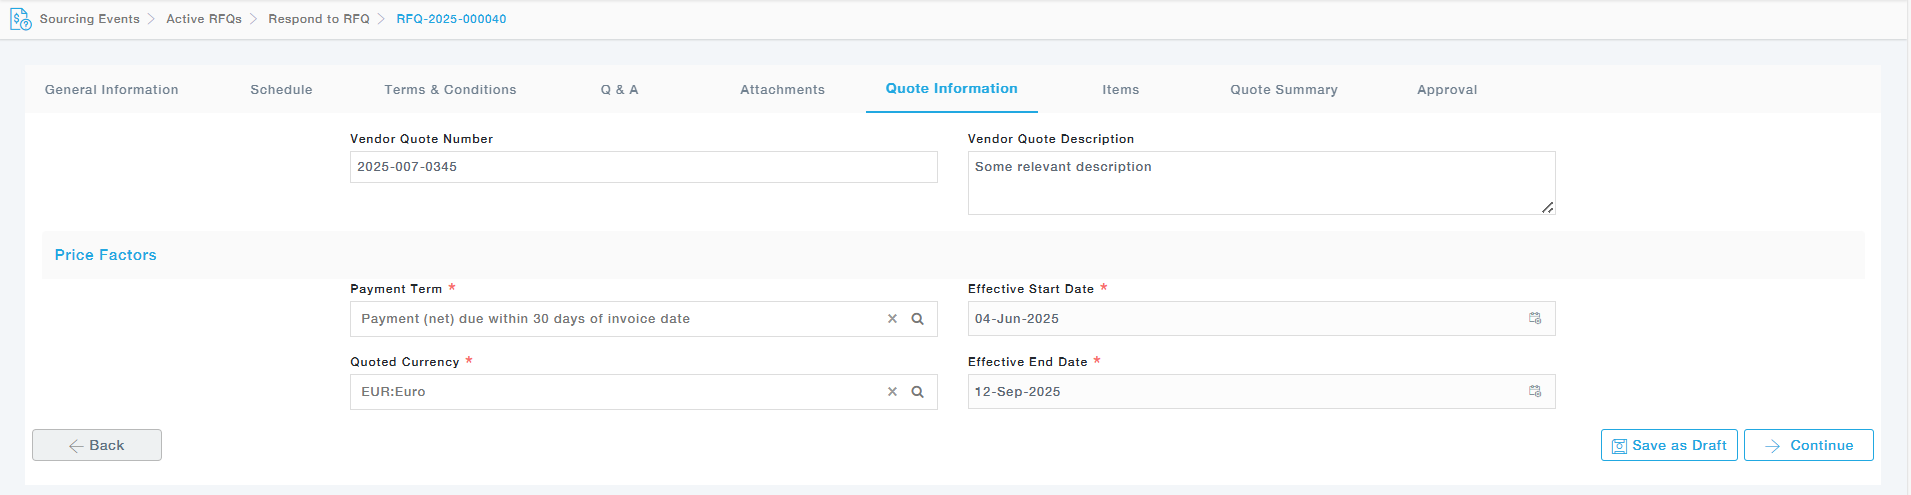
Below is an explanation of each field:
| Field | Description |
| Vendor Quote Number | Enter your internal reference number or quote number for this RFQ. This helps you track your submission within your own system. |
| Vendor Quote Description | Provide a brief description of your quote. This can include a summary or any relevant remarks. |
| Payment Term | Select the agreed payment term for the transaction. For example, “120: 120 days from delivery” means payment will be made 120 days after the goods or services are delivered. |
| Quoted Currency | Buyer has requested you to provide the Quote in a specific currency. However, if preferred, you may be choose to use any other currency from this list of Currencies. Choose the currency in which you are quoting. In the example shown, the currency is INR: Indian Rupee. |
| Effective Start Date | Enter the date from which your quote becomes valid. This is the beginning of the quote validity period. |
| Effective End Date | Enter the date on which your quote remains valid. After this date, the quote is considered expired unless otherwise agreed upon. |
Items: Provides the list of Items for which the quote needs to be provided. Pursuit will have only the Category and Non-Category Items.
Quote Summary: Provides the overall summary of the quotes provided for all items.
Provide Quote
Provide the Quote Through Supplier Portal
Menu Path: Sourcing Events > Active RFQs > Actions > Provide Quote
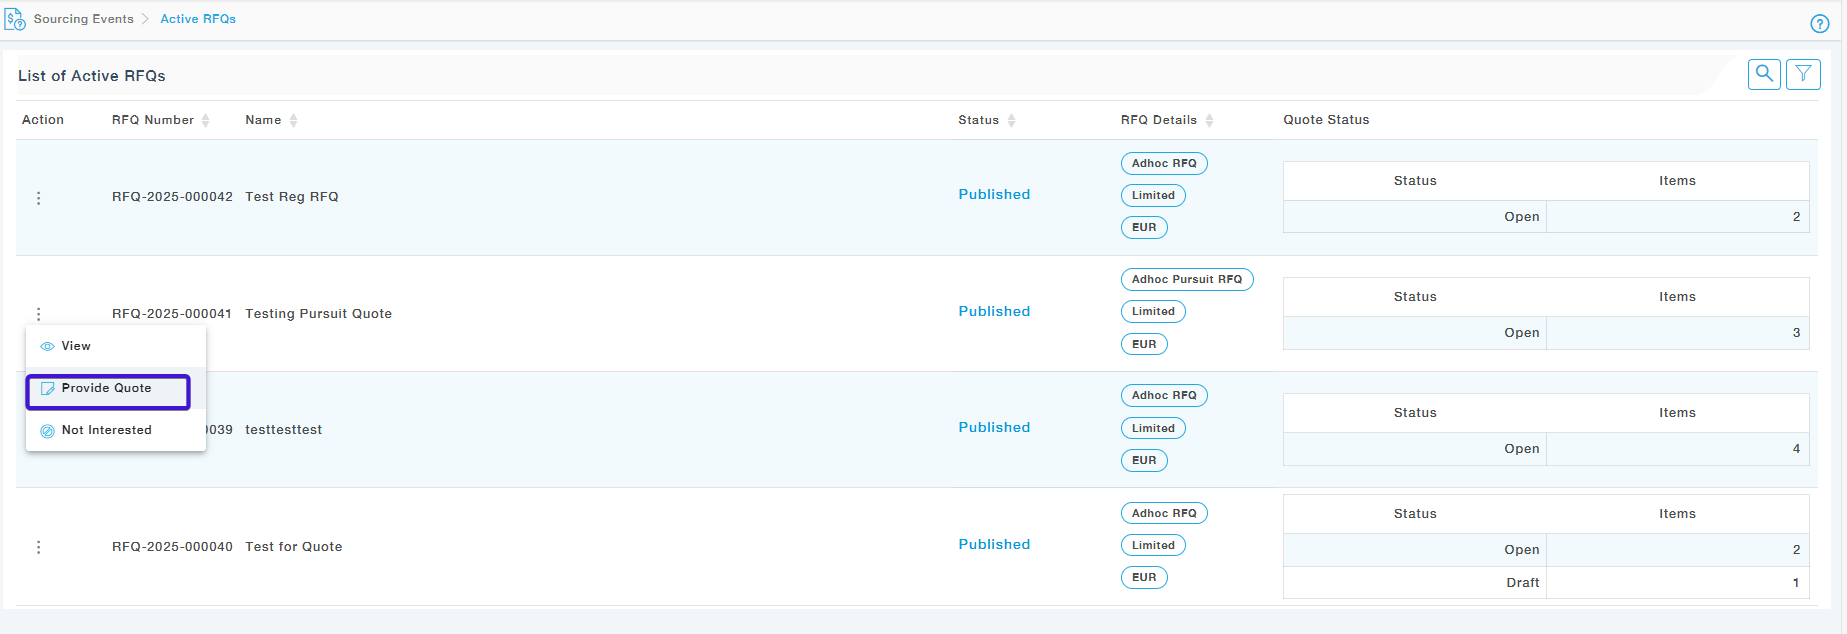

1 – Type of RFQ – Pursuit RFQ or Regular RFQ
2- Limited RFQs are restricted to the selected suppliers whereas Public RFQs can be viewed by all the suppliers
3 – EUR – The quote currency
4- Status of the Quote submission – “Open” indicates that quotes for the items are yet to be submitted, while “Draft” refers to the number of items for which quotes have been saved but not yet submitted.
Q & A
Provide the answers for questions provided in the Q & A tab 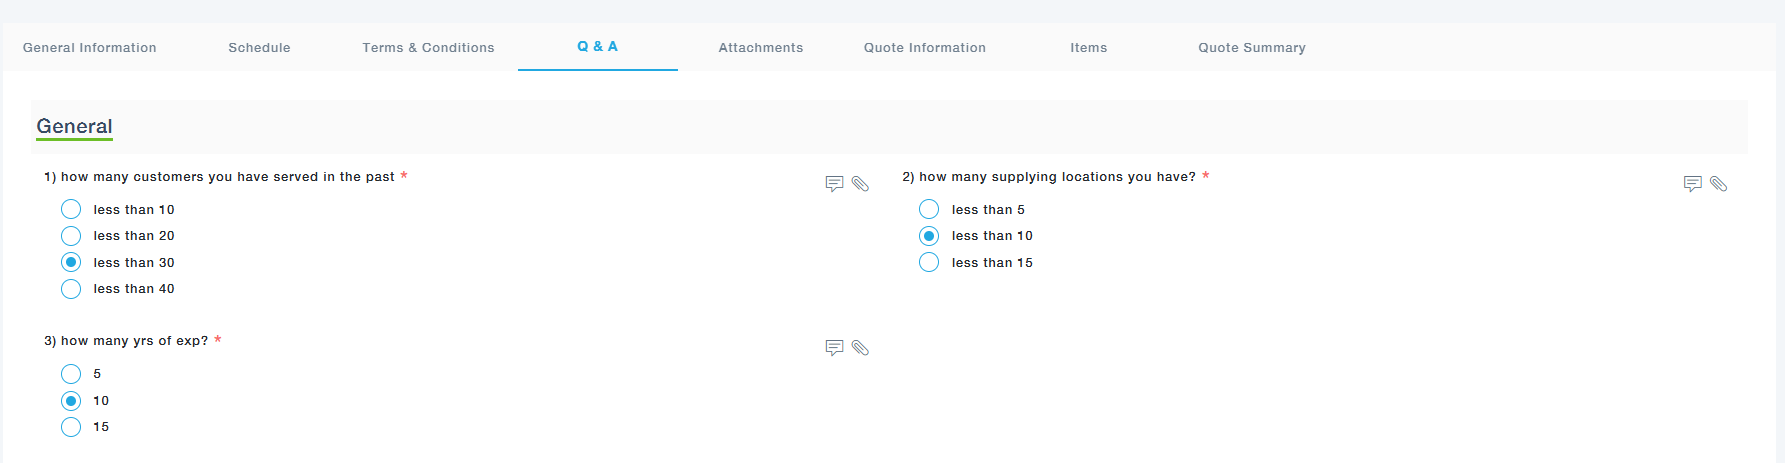
Attachments
The supplier can add the attachments, or any supporting documents related to the RFQ.

Quote Information
Add the relevant quote information.
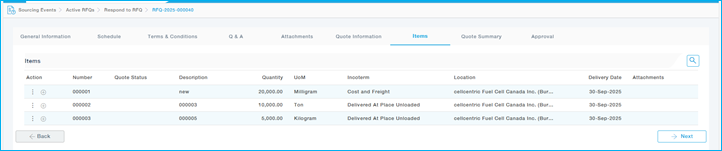
Items
In this tab, the supplier can view the list of items for which the quote needs to be submitted.
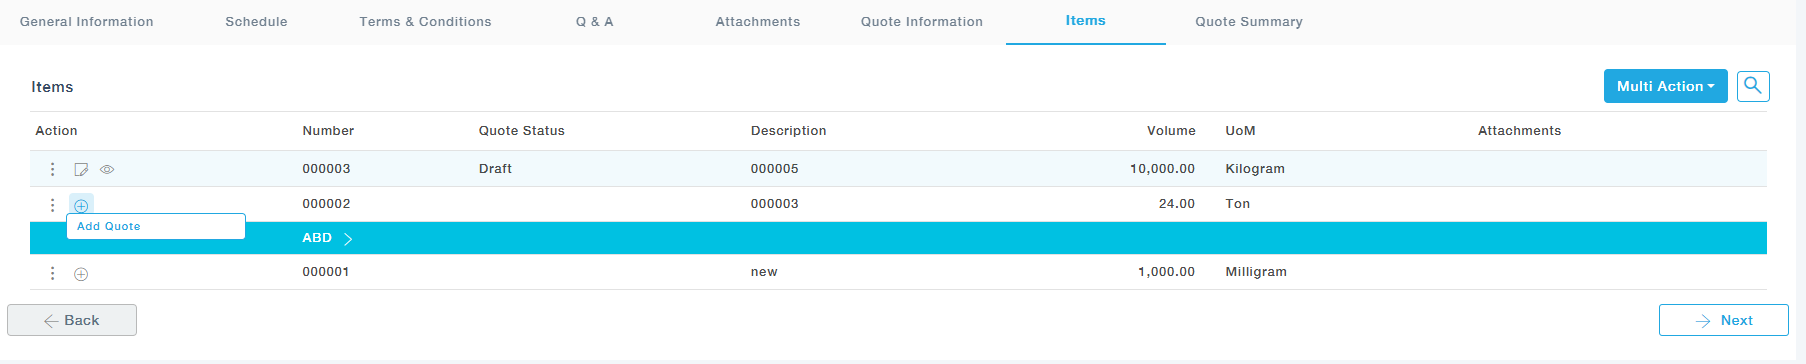
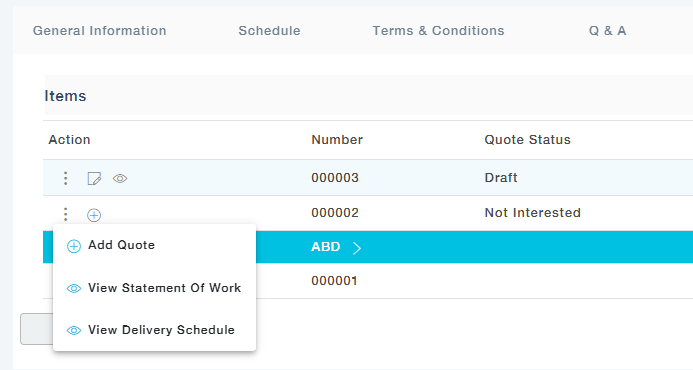
Add Quote
The supplier can choose to add quote using the + icon or using the option in the Actions menu.
If any of the items are not available, the supplier can choose to respond as “Not Interested”.

A pop-up box will appear, provide the relevant reasons and comments. Then click on Submit.
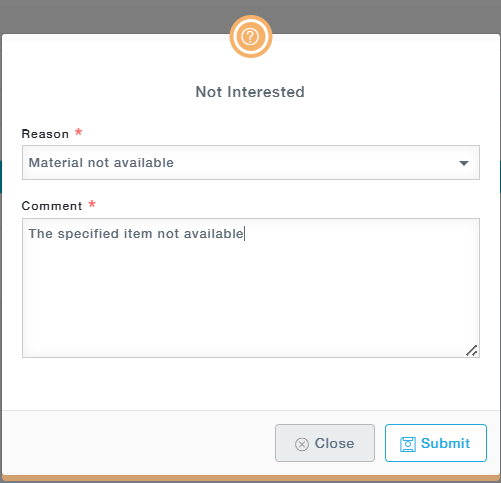
The quote status will be changed to “Not interested”. But the add quote is still available, and the supplier will be able to submit the quote before the final submission.
Add Quote– Click on “Add quote”.
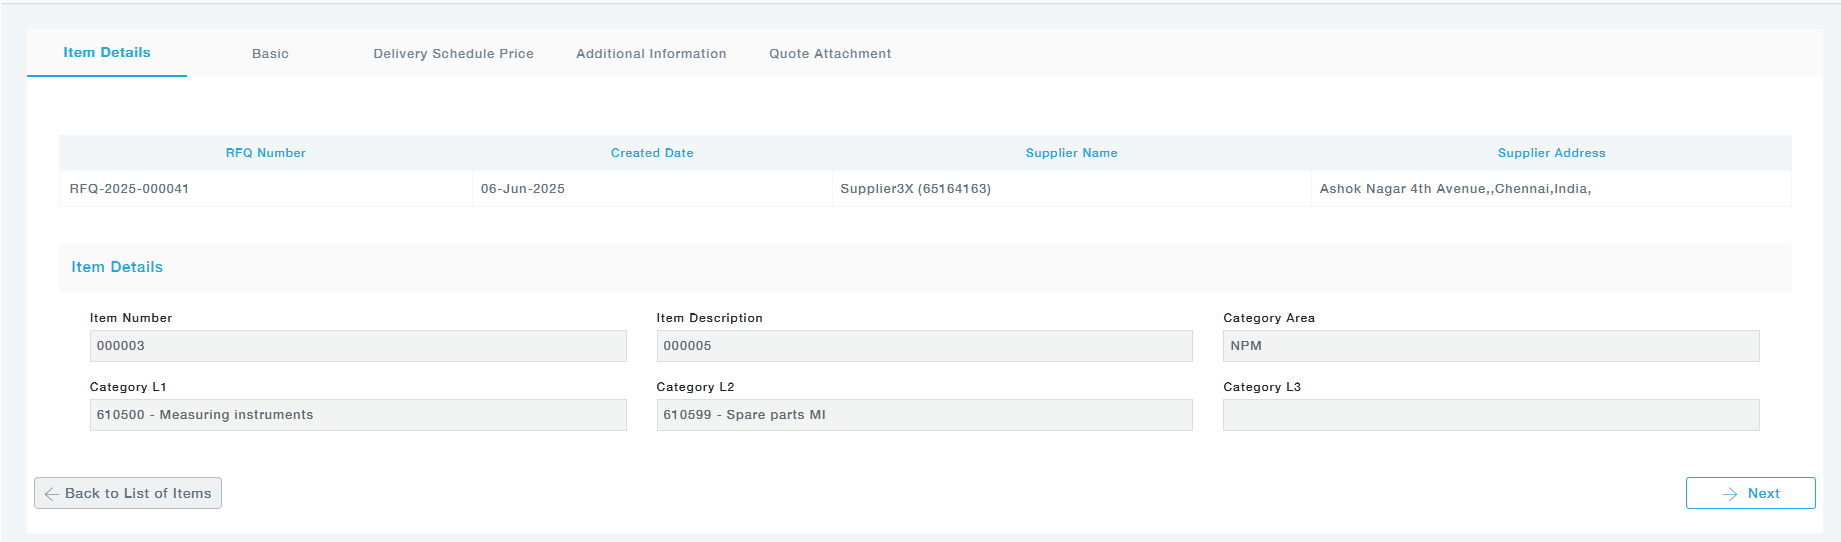
Item Details: Clicking on “Add Quote” will direct you to the Item Details page. This is a read only page, and it provides the basic details of the item for which the quote needs to be provided. Click Next.
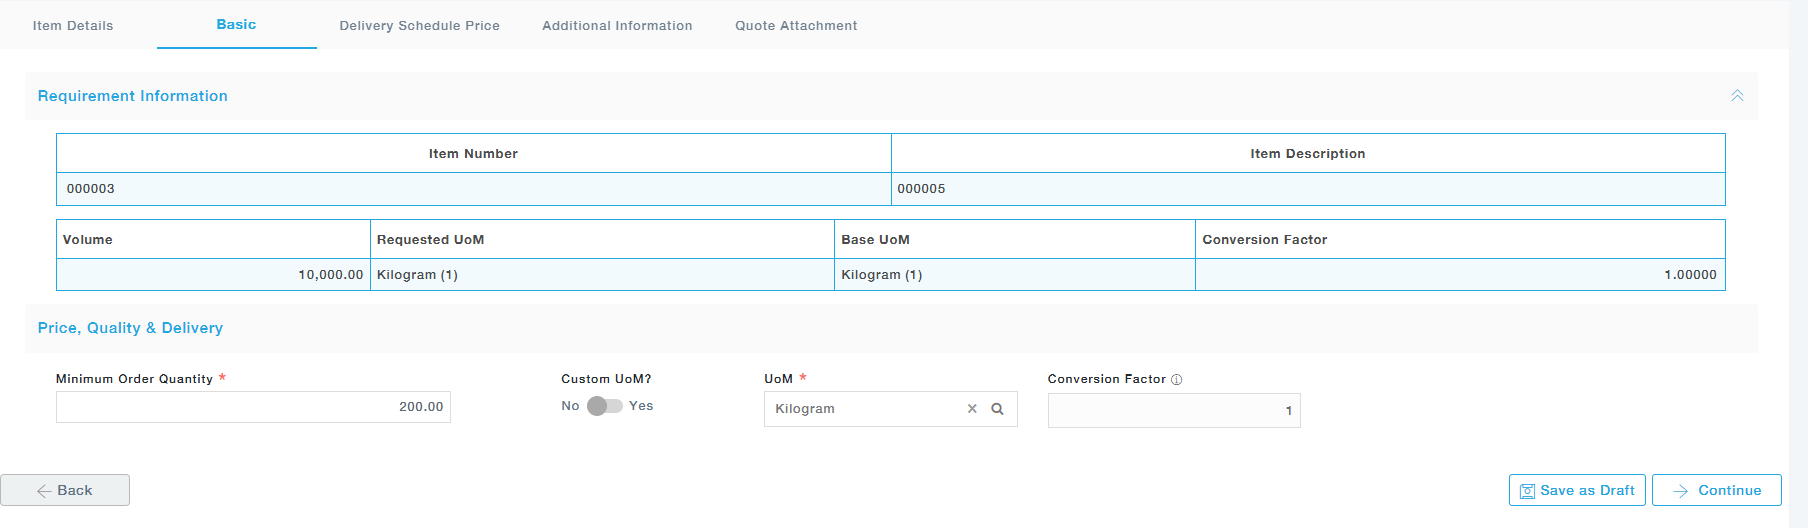
Basics: This tab allows the suppliers to provide-
- Piece Price
- Minimum Order Quantity
- UoM (Custom / Standard)
- Convertion Factor
Note: The UoM Conversion factor is automatically populated based on the supplier selection. Supplier can also provide a custom UoM and provide the Conversion factor as well. The UoM field by default will be filled based on the UoM provided by the buyer while creating the Pursuit RFQ.
Delivery Schedule Price: This tab captures detailed pricing and delivery info for scheduled deliveries, useful for Pursuit RFQs across multiple time periods (e.g., quarters or months).

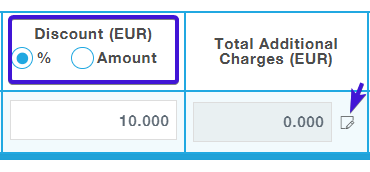
Discount for the given item can be provided as % or Amount which can be entered in the field. Total Additional charges can be edited by clicking on the edit icon as indicated.
A pop-up will be displayed where the supplier can add the additional charges that is included with each item.
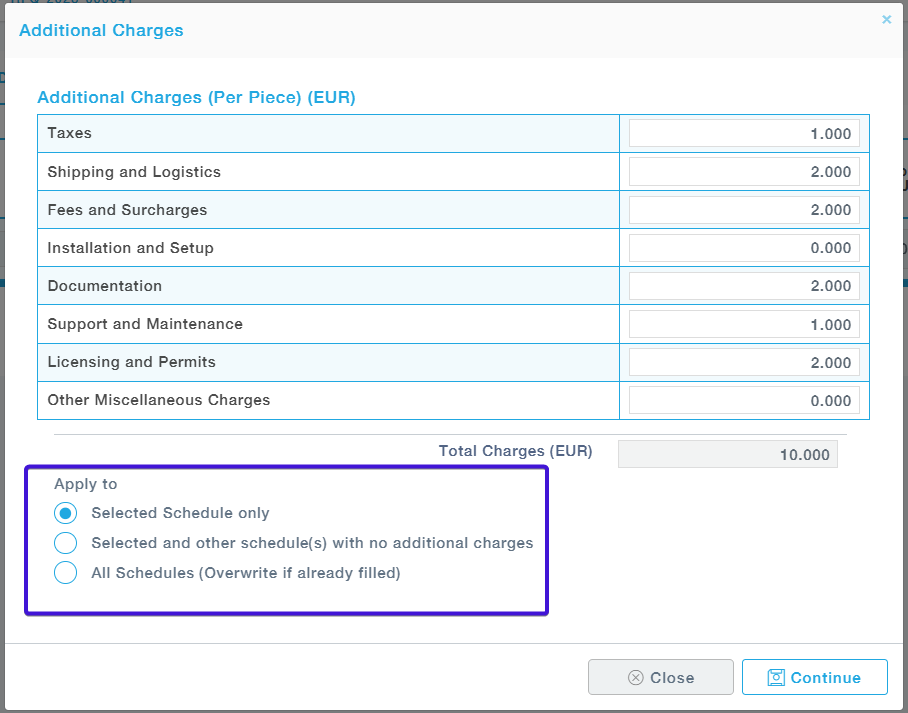
Selected Schedule only
- The additional charges you entered will apply only to the currently selected delivery schedule (e.g., a specific quarter or month).
- Other schedules will remain unaffected.
- Selected and other schedule(s) with no additional charges
- The charges will be applied to the currently selected schedule, as well as to other schedules that do not yet have any additional charges entered.
- Schedules with existing charges will remain unchanged.
- All Schedules (Overwrite if already filled)
- The charges entered will be applied to all available schedules, replacing any previously entered values.
| Field Name | Description |
| Schedule | Specifies the time period for which the pricing is applicable (e.g., “2026 – Quarter -1”). Allows scheduling-based pricing. |
| Volume | Total quantity to be delivered during the specified schedule. The UoM is provided by the buyer while creating the RFQ |
| Location | The delivery destination selected by the supplier. This is where goods are expected to ship. It is a read only field and it is provided by the buyer during the RFQ creation |
| Incoterm | This field is by default populated based on the buyer’s inputs. But this can be edit by the supplier |
| Incoterm Location | The location associated with the Incoterm. This field is filled by the supplier |
| Net Piece Price | The base price per unit before applying discounts or additional charges |
| Discount | A discount applied either as a percentage or a fixed amount on the Net Piece Price. Supplier selects the applicable mode. |
| Total Additional Charges | Any other cost components added to the base price such as packaging, freight, handling, etc. Entered as a total value. It is edited using a small icon provided besides the field |
| Gross Piece Price | Automatically calculated as: Net Piece Price + Total Additional Charges – Discount. |
| Distributed Discount | System-calculated or manually distributed discount per unit based on total discount applied. |
| Distributed Additional Charges | Additional charges are apportioned per unit. |
| Final Piece Price | The final price per unit after considering all applicable discounts and additional charges. This is the value considered for evaluation. |
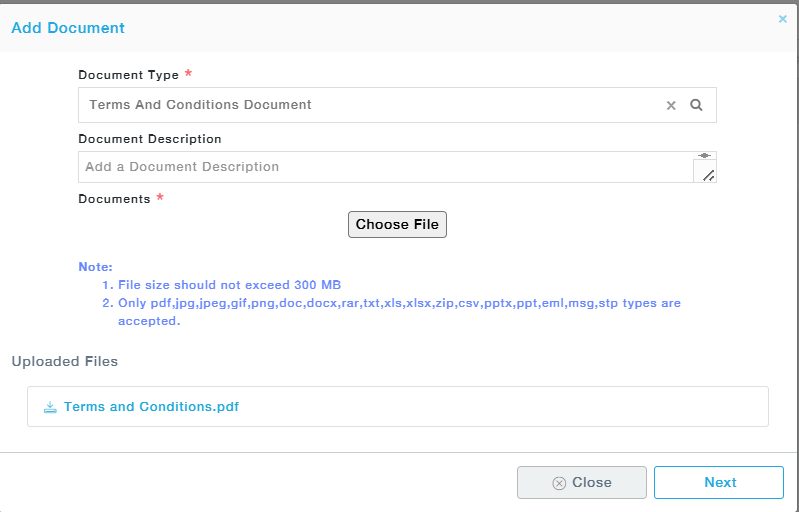
Additional Information – Add additional details.

Quote Attachment – Add the attachments related to quote.

![]()
Click Save and Proceed.
Note: Once saved, the page automatically directs to the line items page for adding quotes for other items listed.
In this page the supplier can edit / view the submitted quote.

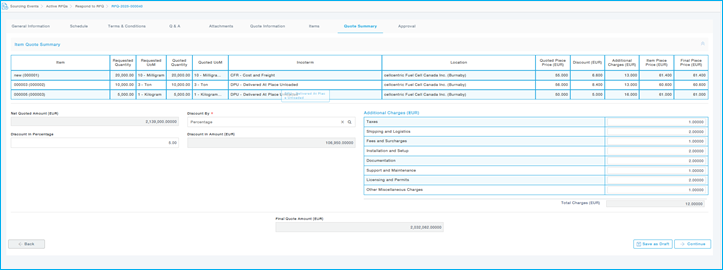
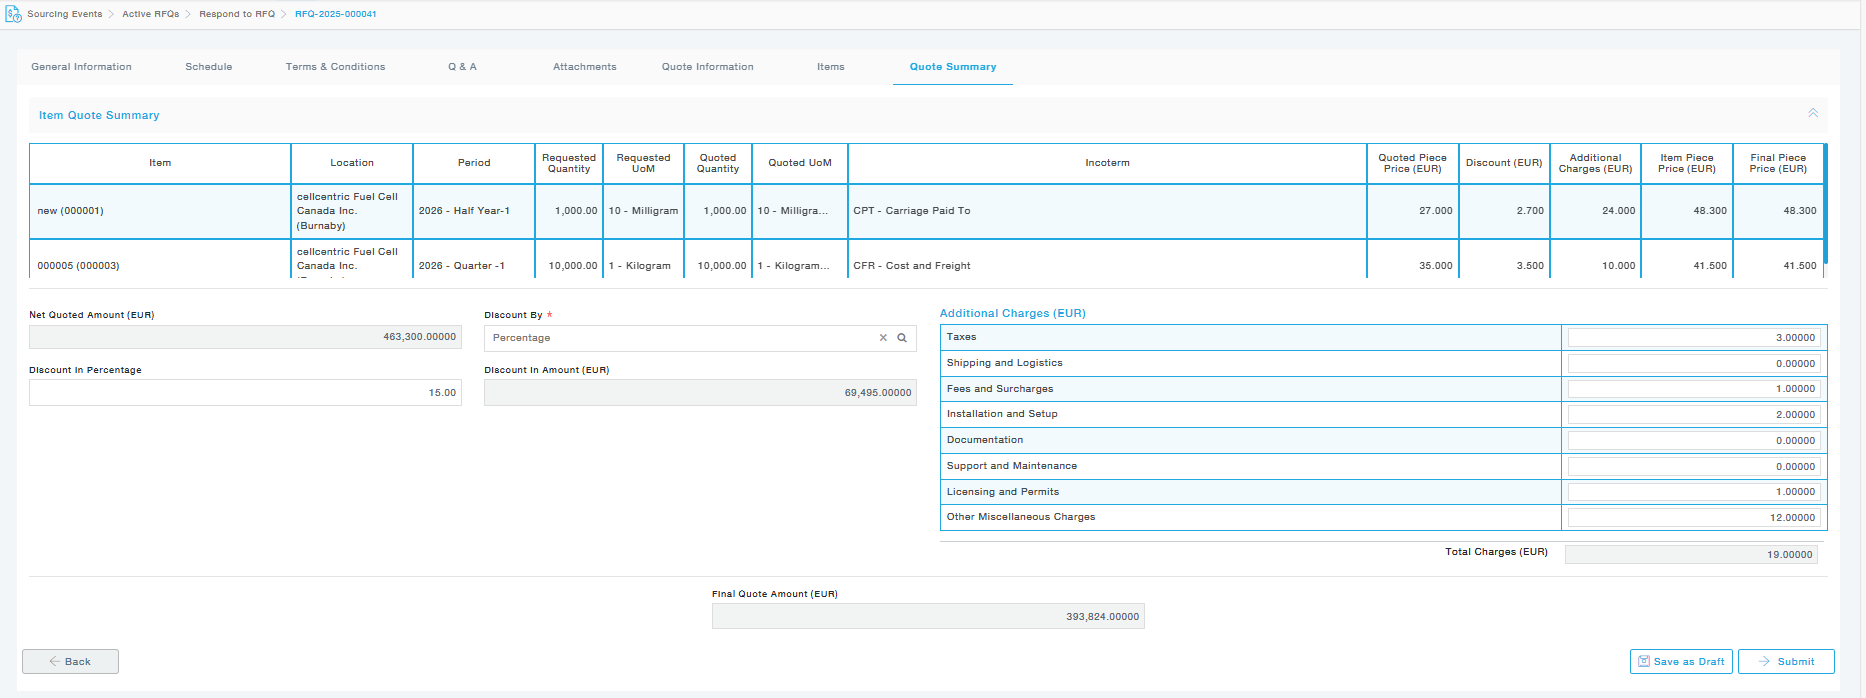
Quote Summary – This tab provides the overall summary of quotes provided for all the items. Here the supplier can also add discounts and additional charges. At this stage, the quote can be saved as a draft and submitted later.
Actions
View- View the entire RFQ
Provide Quote – Directs Directly to the Items tab
View Quote Response – Allows the user to view quote for each item
![]()

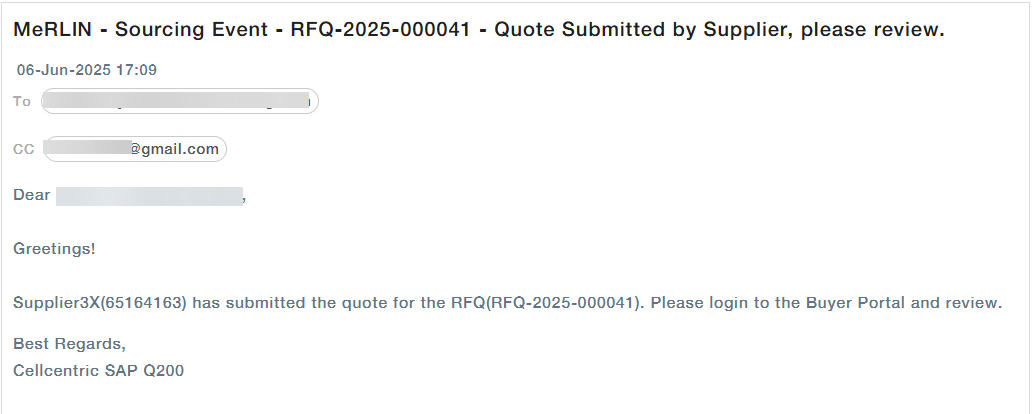
Once the quote is submitted the buyer and supplier will receive an email communication as shown below
Provide the Quote Through Email Link
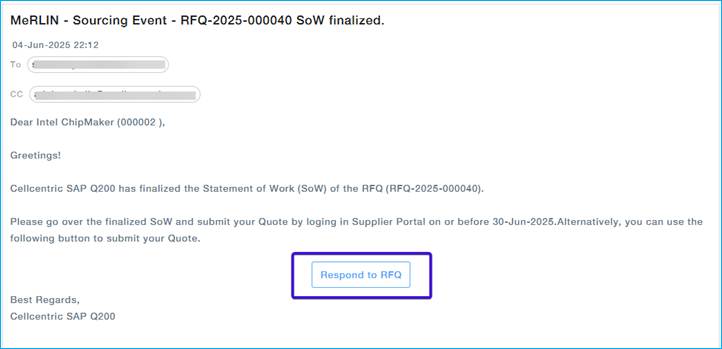
After the SOW is finalized by the Buyer, the supplier will receive an e-Main notification to provide Quote.
Click on the “Respond to RFQ” to provide the quote.
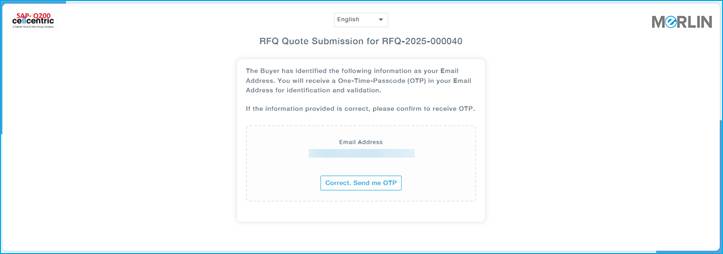
You will be directed to a page to confirm the email ID where the OTP will be sent.
Click on “Correct, Send me OTP” button.
Supplier will receive an email with OTP.
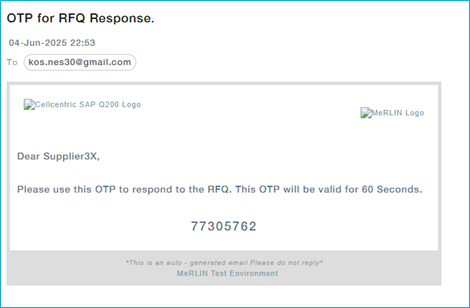
Provide the OTP and Click on “Confirm & Proceed”.
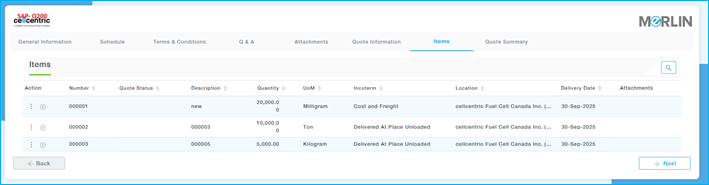
You will be directed to the landing page as shown below.
The supplier can add the quote using the + icon or using the action menu. The subsequent steps closely mirror the process of submitting a quote via the supplier portal
Provide the Quote through excel template
The supplier can easily download the quote template from the “Multi Action” option fill the quote details and upload them using “Upload quote template” option.
The option is available for the supplier in both supplier portal and email link.
Supplier Portal:
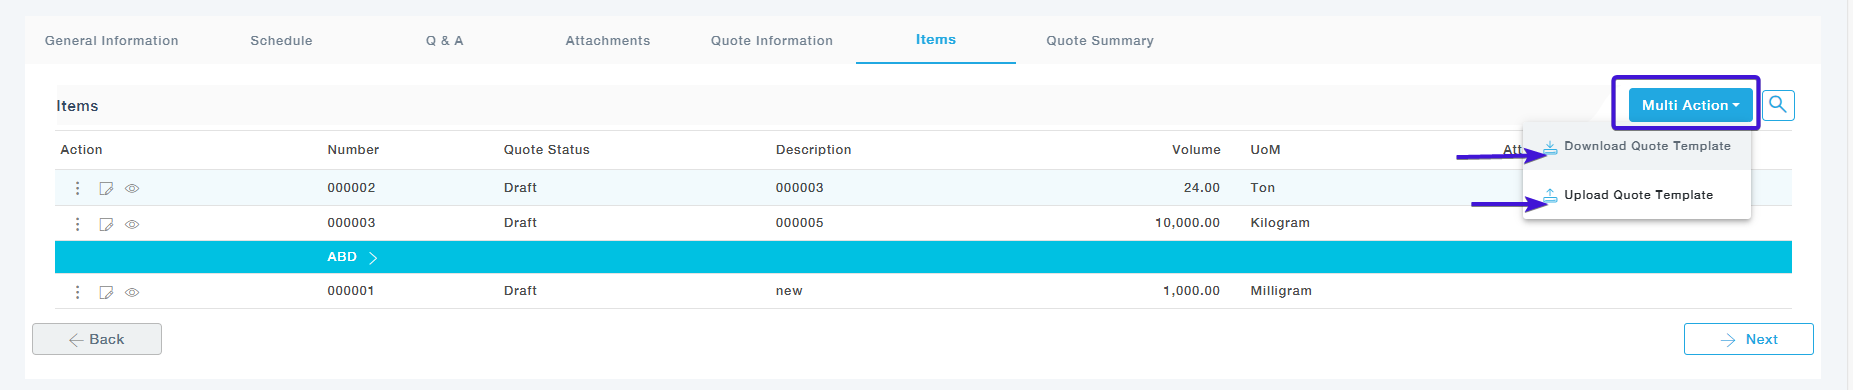
Email Link:

- Click on the “Download Quote Template”, the template will be download in excel format
- The excel files contains multiple tabs as shown below
- The instruction sheet will provide the details on how this workbook needs to be handled
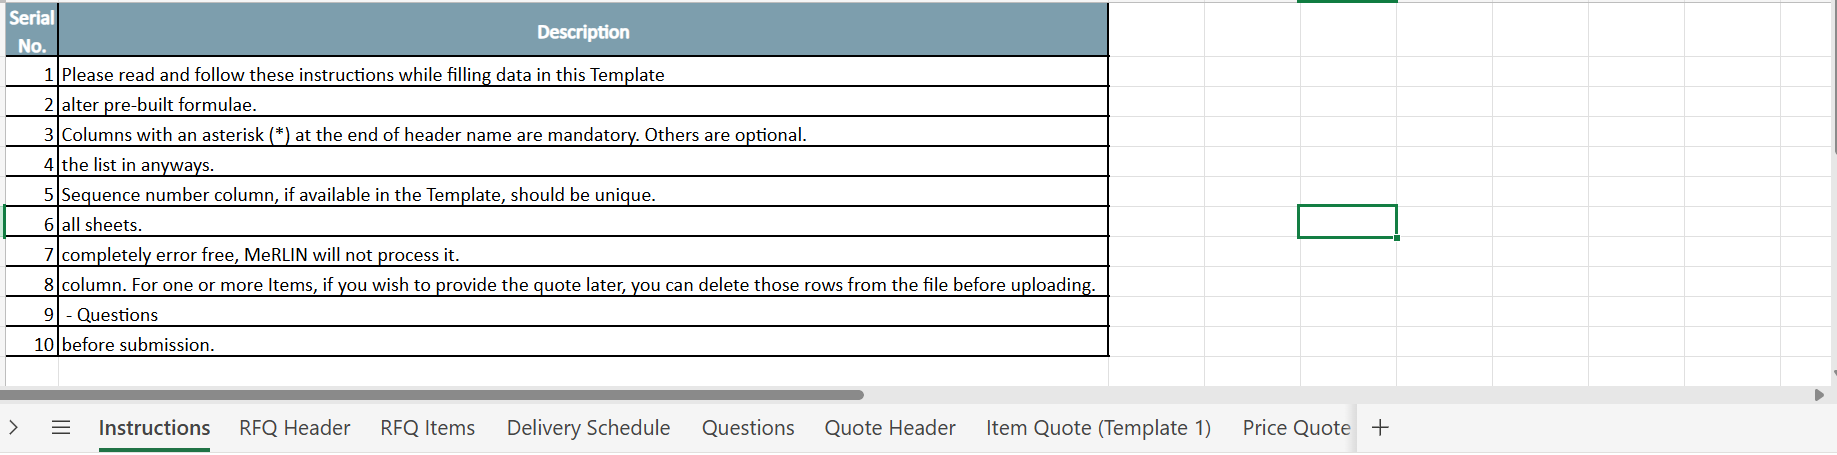
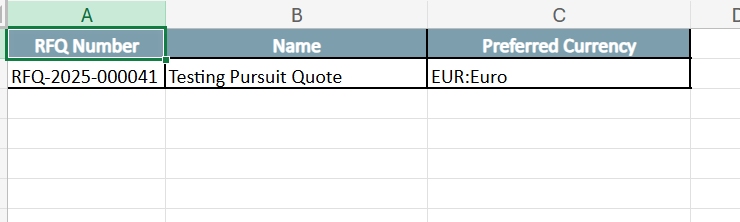
RFQ Header Sheet – Prefilled sheet based on the details provided by the buyer
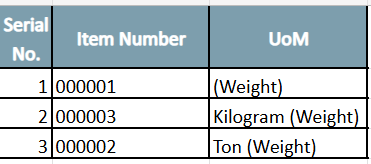
RFQ Items – This sheet gives the list of items added to the RFQ which is auto-populated
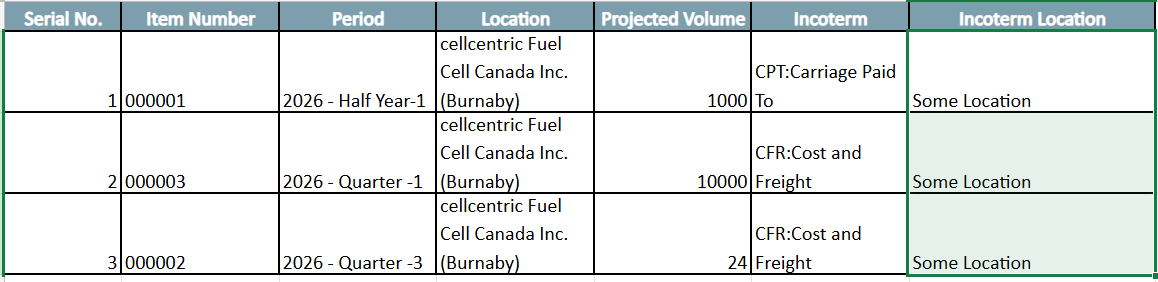
Delivery Schedule – Provides the prefilled details such as Period of delivery, location, the projected volume and incoterm. The incoterm location can be filled by the supplier.
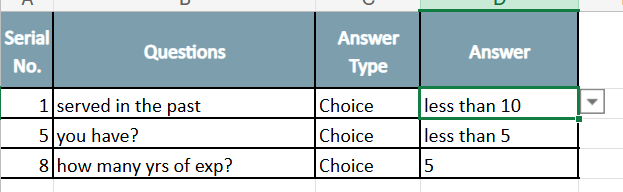
Questions – Provides mandatory questions that need to be answered by the supplier. The Answer type and options are provided by the buyer.
Quote Header – In this sheet the Supplier can fill the Vendor quote number, Vendor Quote description, Quoted Currency and payment term

Item quote (template1) -The quoted UOM, Custom UOM, Conversion factir, MOQ, T&C can be filled in this page. The rest of the details are pre-filled.

Price Quote (Template 1) – This sheet allows the supplier to add the discounts and additional charges and the final piece price will be calculated. 
Quote Summary – This sheet provides the overall summary of quotes provided for all items. Here the supplier can also add discounts and additional charges.

Once all the required details are filled in, the supplier can upload the completed workbook either directly through the Supplier Portal or via the email link. The data from the workbook will be automatically captured and reflected in the system.